How to Make Homemade Bone Broth

Last year I started to make my own chicken and turkey broth for the very first time. When Thanksgiving came around, I snatched up the turkey bones and made so much broth that I ran out of containers. I literally started to give it away to anyone that would take it. If I can do it, you can to!
What is the difference between broth and stock? I’ve read that stock is made from the bones and broth is made from the meat. I’ve also read that broth is seasoned and stock is not. I don’t think it matters what you call it, but for this post I’m calling it broth.
Why make your own bone broth?
The number one reason to make your own broth is so that you can control what is in your broth. Some store bought broth contains MSG, which is something many people try to avoid. Store bought broth can also contain a lot of sodium.
When bone broth is made properly and with pure ingredients, it is actually quite nutritious and good for you. Bone broth helps with digestion and boost your immune system. You can read more about the benefits here.
Lastly, it is good stewardship to make bone broth. You are taking bones that would normally go straight into the trash and turning them into something nutritious you can feed your family. That is just awesome.
What you need to make bone broth:
At the bare minimum you will need chicken or turkey bones, water, a large pot or crockpot, and containers to store the stock.
You can also add carrots, celery, onions, garlic, and parsley.
How to make bone broth:
Step 1: Take all of your bones and place them in your large pot or crockpot. Cover with cold water and a splash of vinegar. Let the bones sit for 30 minutes before you start to heat the water.
The vinegar is totally optional. I learned that tip from Katie at Kitchen Stewardship. She says the vinegar helps to draw out the nutrients in the bones.
Step 2: Bring the pot of water to a boil and then let it simmer for several hours. The minimum you’ll want to simmer your pot is 4 hours. If you are using a crockpot, I recommend doing it on high for 4-6 hours or on low for at least 8 hours.
When I make my stock, I like to let it simmer for at least 8-12 hours. I’ve even done it for nearly 24 hours. Sleeping with a pot simmering on the stove is not something I was used to, but there is very little risk of scorching since the pot is full of water.
Step 3: Add veggies to increase the flavor and nutritional value. Make sure to scrub them clean. There isn’t an exact science to this, so just add whatever you have.
You can add the veggies as soon as you start to heat the water or wait until you only have an hour or two left of simmering time. Again, this is a very flexible system.
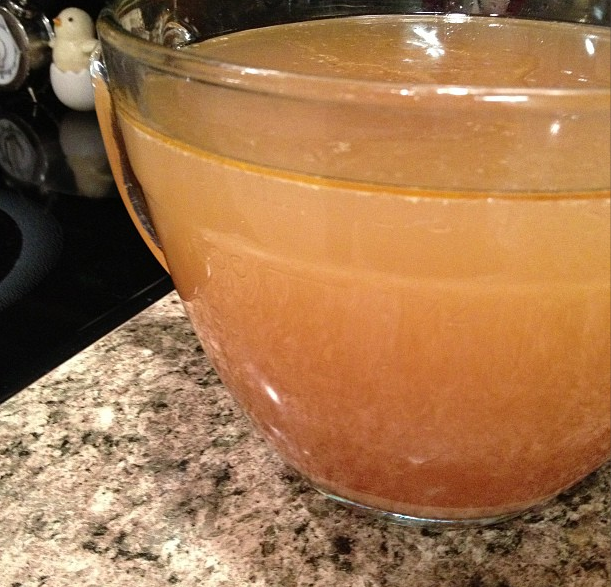
Step 4: Remove from the heat and strain the broth to remove the bones, veggies, and any other floating particles. Then set aside the stock to let it cool.
Step 5: Pour the bone broth into storage containers. I’ve used plastic yogurt containers (the big ones) and glass mason jars.
It is helpful to measure how much broth you are putting into each container. Then label the container with the date and measurement. When a recipe calls for broth, you can easily see which container you should thaw out that will have enough for your recipe.
To avoid cracks and breaking jars when freezing in glass jars, cool the bone broth completely in the fridge for a day or two to make sure it is cold before putting the jar in the freezer. It is also helpful to lay the jars on their side in the freezer. Read this article for more tips on freezing in glass jars.
Another great way to freeze broth is in ice cube trays and then pop them out into a freezer bag. I find it helpful to have cubes of broth that I can easily throw into dishes. No thawing necessary! This is the only way that Beth from Red and Honey stores her broth.
Additional Tips:
Salt or no salt? Personally, I don’t season my homemade bone broth. Since I don’t salt my broth ahead of time, sometimes I need to add extra salt to the recipes I’m making. Store bought broth usually has salt added, so you might find your dishes a little bland if you don’t compensate for that.
Don’t forget to pick off any meat that is left on the bones. Sometimes you are able to get a lot more meat off after simmering the bones for several hours.
Don’t know how to use your homemade bone broth? Start simple by using it in any recipe that you would normally use store bought broth or bouillon cubes. You can also use it in place of water when cooking rice.
The next time you roast a chicken or prepare a turkey, I hope you’ll consider giving this a try. I dare you to take a large bag over to Grandma’s house on Thanksgiving and take the bones home with you!
This is the basics of making bone broth, but if you want more detailed information about the process or the health benefits, read this post (and all the helpful links at the end) from Kitchen Stewardship.
Amounts? How many bones? How much water? How much of everything else.
Jackie, this method is extremely forgiving. Use all the bones you have leftover from your bird. Fill up your biggest pot with water or a crockpot. Throw in several carrots (3-4 big ones?), the same amount of celery, and at least one onion quartered. That should be good, but you can certainly add more or less of any of the ingredients.
I love doing this. I just pressure can the broth then I have it available at a moments notice. Fast and easy.
I’m jealous of your pressure canning skills, Marge. Do you do meats too? Canned chicken is so tender!
I do can meat whenever I can. One out favorites is venison. When on the farm I would can chicken when it came time to bring in new layers. It’s a great way for the kids to make a fast and easy meal. Just add noodles and open a jar of green beans and it’s done.
I saved my turkey carcass in my freezer this year and am going to follow your directions for broth. Thanks for sharing this idea. I have never thought of it before.
Excellent! I hope it turns out well for you.
I’m wondering if I can use the “stock” left over from boiling my chicken? The only reason I’m worried I shouldn’t would be too much heat ruining the nutrients??
I think it should be fine. Using that stock would for rice would certainly be healthier than using water. I say go for it!
Thank you so much for posting this! I just cooked turkey for New Year’s, and I was looking for an easy way to make broth. Your description was perfect and inspired me to make this very soon!
Lisa, how did your broth turn out?
Have you ever put grass fed gelatin in the broth for added nutrition?
I haven’t tried that, Kim. Is that how you usually make it?
Bone broth is also great for dogs. I go to the meat market & get them, fill my crackpot with water & season w/ turmeric & cook on low for 24 hours. The pups chew on the bones afterwards & the extra meat & broth gets used in their food 🙂
Bonnie, that is awesome that you make such good food for your dogs! If this is how well your dogs eat, I bet your family eats amazing food!
I put up almost all the food we eat and find that I run out of freezer room quickly. We have 1 freezer for meat, 1 freezer for veggies and spices and a third freezer for entrees or meals that I have cooked ahead of time, separated and froze. The third is a chest freezer which I use baskets in for separation. For my broths, I find it very helpful to put it up in jars with pressure canning. I look up canning time for all ingredients and go with the longest. It is usually 45 mins. at 10 lbs.. This is especially good if your power goes out often.
I can’t imagine having that much in my freezer to need 3 freezers! That is just amazing!!!
I have 3 freezers because we grow most of our food I can prepare whatever makes the meal great. My pressure cooker, dehydrator and freezers save most of the food we will need until the next growing season. I also live in a rural area and get to a food market about once a month. I started growing and preserving food when my children were little. They are in their late 40s now. They grew up without allergies, without broken bones and with a lot of fresh unsprayed food. I still strive to have the least amount of preservatives or pesticides in my food. It is worth the effort as I love to cook.
That all sounds fantastic, Teresa! I wanna come eat at your house!
Do you have to start with raw bones or is it ok to use already cooked turkey bones?
I always use “cooked” bones. I’ll cook a turkey or a chicken, eat the meat, and then use the bones to make a broth.
Hi there! I’m simmering chicken bones for stock as I text! I’m going to cook the stock overnight in the crockpot using the broth from my Paleo whole 30 chicken and & vegetables crockpot meal we had for dinner. (First I’m cooling the broth in the fridge so that I can skim the fat off of the top, then, back into the crockpot it goes.) This Broth from tonight’s dinner cooked all day long w/ carrots, onions, celery, garlic, salt & pepper& fresh thyme, plus the juice of one lemon, then the juiced lemon halves went into the bird. I think the broth, cooking in the crockpot overnight with the bones and added water will give me a healthy stock to add the shredded chicken and vegetables to for soup tomorrow!
That sounds fabulous, Martha! Was the soup as amazing as it sounded like it would be?
I make my frozen Baby Lima beans in chicken broth instead of water, only adding salt and pepper… delicious, and no butter needed! Thicker and more delicious when reheated the next day.
How much broth do you use? Does it cook down enough that you don’t need to drain the beans?
I don’t measure the chicken stock or bone broth, but pretty much cover the frozen beans with it and bring to a boil, then let them cook on low heat (covered) until the broth cooks down and the beans are nice and soft. I add a lot of pepper and a fairly good amount of sea salt while they are cooking. Don’t overdo salt beuse you can always add more to taste. If cooking dried limas in the crockpot I’d be very generous with the broth since they will soak up all that healthy goodness. I NEVER throw out good bone broth …don’t drain, just let them be nice and soupy the good ole southern way! Left overs are better the next day hen reheated!
Thank you so much, Martha!